Homemade Peanut Butter Cups with Cashew Butter
Highlighted under: Everyday Baking Ideas
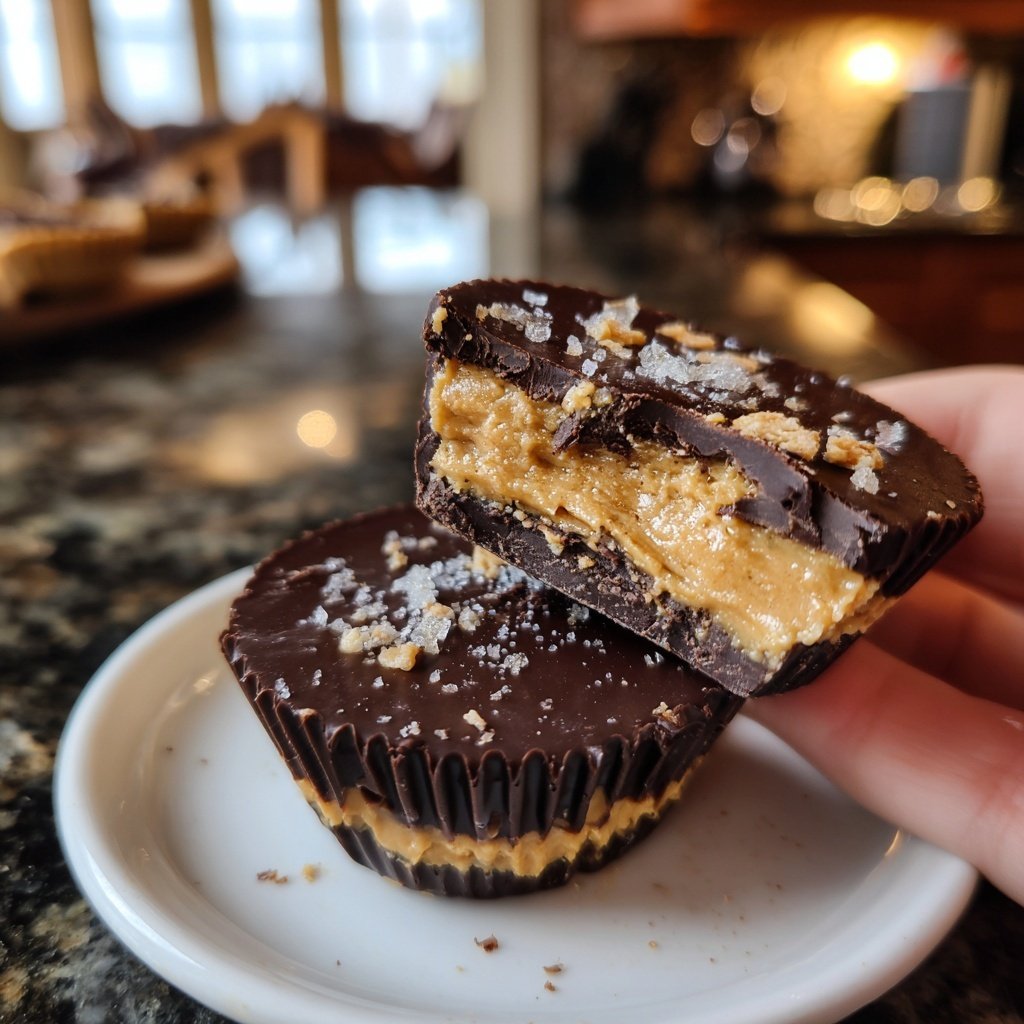
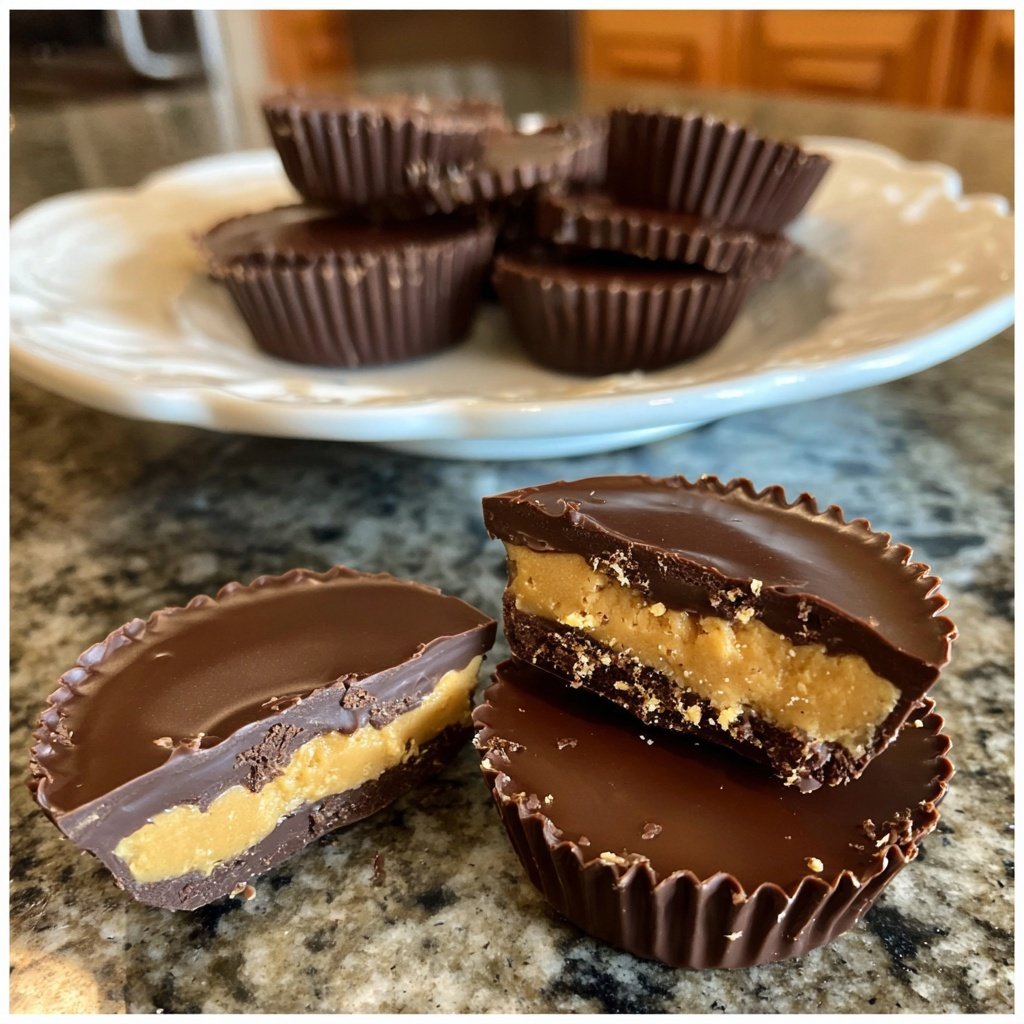
I absolutely love making these homemade peanut butter cups with cashew butter because they combine rich flavors with a delightful crunch. The blend of creamy cashew butter and smooth chocolate results in an indulgent treat that is surprisingly simple to prepare. Once you try making these at home, you’ll never want to go back to store-bought versions again! Plus, they are perfect for satisfying those sweet cravings while still feeling a bit healthier than traditional candies.
When I first attempted to create these homemade peanut butter cups, I was excited yet apprehensive. I experimented with different nut butters, and cashew butter won my heart for its creamy texture. I've discovered that by blending cashew butter with a bit of powdered sugar, it enhances the flavor and ensures a perfect consistency for layering.
The best part is how satisfying it is to coat these delightful rounds in melted chocolate. I learned that tempering the chocolate properly gives a beautiful shine and a satisfying snap when you bite into them. It's a celebration of flavors that I can't wait to share with friends and family!
Why You'll Love This Recipe
- Creamy cashew butter adds a unique twist to the classic peanut butter cup.
- Homemade treats ensure no preservatives or artificial ingredients.
- The combination of salty and sweet flavors is simply irresistible.
The Importance of Quality Ingredients
When making homemade peanut butter cups, the quality of your chocolate and nut butter greatly influences the final flavor. I recommend using high-quality dark chocolate—look for at least 70% cocoa for a rich taste that balances well with the sweetness of the filling. The coconut oil not only assists in achieving a smooth melt but also contributes to a glossy finish, making your cups visually appealing.
For the cashew butter, choosing a creamy variety will help create a smooth filling that blends seamlessly with the chocolate. If you prefer, you can substitute with almond butter or even a homemade version by blending roasted cashews until smooth. Just keep in mind that the flavor profile will slightly change. The goal is to use a nut butter that complements both the chocolate and the sweetness of powdered sugar.
The Art of Layering
Layering the chocolate and the cashew butter filling properly is essential for the perfect bite. When you melt the chocolate, ensure it’s fully melted and flows smoothly off the spoon before pouring into the molds. This helps create a nice, even layer that will hold its shape once set. When molding, allow the chocolate to rise slightly up the sides for a better seal and to prevent leaking when you add the filling.
After placing the cashew butter filling, remember to smooth it out before adding the top layer of chocolate. This ensures that your cups have a balanced layer of chocolate and cashew butter throughout. If you notice that the chocolate is not setting properly, it might be a good idea to chill the mold a little longer before adding the filling to maintain the structure.
Variations and Storage Tips
Feel free to customize these peanut butter cups with your favorite additions! You can mix in chocolate chips, sea salt, or even a sprinkle of crushed nuts in the cashew butter filling for added texture. For a spicier kick, try adding a dash of cinnamon or chili powder to the chocolate before pouring into the molds. These tweaks can elevate the flavor profile and make each batch uniquely yours.
Once your cups are ready, they can be stored in an airtight container in the refrigerator for up to two weeks—perfect for satisfying cravings on the go! If you want to keep them longer, consider freezing them. Just place them in a single layer on a baking sheet until solid, then transfer to a freezer-safe container. For best results, thaw them in the fridge before enjoying, as this will retain the creaminess of the cashew butter.
Ingredients:
For the Chocolate Coating
- 1 cup dark chocolate chips
- 1 tablespoon coconut oil
For the Cashew Butter Filling
- 1 cup cashew butter
- 1/4 cup powdered sugar
- 1/2 teaspoon vanilla extract
- 1/4 teaspoon salt
These ingredients come together to create the perfect balance of flavors and textures!
Instructions:
Prepare the Chocolate Coating
In a microwave-safe bowl, combine dark chocolate chips and coconut oil. Microwave in 30-second intervals, stirring in between until fully melted and smooth.
Mold the Chocolate Cups
Pour a tablespoon of the melted chocolate into each cup of a silicone muffin mold. Spread it along the sides to create a layer. Place the mold in the freezer for about 10 minutes to set.
Make the Cashew Butter Filling
While the chocolate sets, mix together the cashew butter, powdered sugar, vanilla extract, and salt in a bowl until well combined.
Add the Filling
Remove the mold from the freezer, and add a tablespoon of the cashew butter mixture into each chocolate layer, smoothing it out with the back of a spoon.
Top with Chocolate
Pour another tablespoon of melted chocolate over the cashew butter filling in each cup. Make sure to cover it completely.
Chill and Enjoy
Return the filled mold to the freezer for at least 30 minutes until fully set. Once hardened, pop them out of the mold and enjoy!
These peanut butter cups can be stored in an airtight container in the fridge for up to one week.
Pro Tips
- For an added touch, sprinkle some flaked sea salt on top of the chocolate before chilling for a delightful contrast.
Troubleshooting Common Issues
If you encounter chocolate that won’t melt smoothly, it could be due to overheating. Always melt chocolate in 30-second intervals in the microwave, stirring thoroughly each time until it’s just melted. If you accidentally overheat it, try mixing in a teaspoon of coconut oil to help bring it back to a silky consistency for a better coating.
Another common issue is when the chocolate separates from the cup when you bite into it. This is often due to using too much powdered sugar in the nut butter filling. Ensure you don’t exceed the recommended amount, and consider adding a touch more cashew butter to help the mixture hold its form better.
Serving Suggestions
These homemade peanut butter cups are delicious on their own, but you can enhance your presentation by serving them on a platter with fresh fruit like strawberries or bananas. Pair them with a scoop of vanilla ice cream or yogurt for a delightful dessert experience. Dusted with powdered sugar or dipped in more melted chocolate, they can easily become gourmet treats for special occasions.
To elevate the indulgence, consider drizzling some melted chocolate over the top for an extra decorative touch. You might also experiment with flavor pairings by serving them alongside a cup of espresso or a glass of cold milk—complementary flavors can provide a great balance to the sweetness of the cups.
Questions About Recipes
→ Can I use regular peanut butter instead of cashew butter?
Absolutely! Regular peanut butter will work perfectly for this recipe if that's what you have on hand.
→ How should I store the peanut butter cups?
Store them in an airtight container in the fridge for up to a week, or freeze them for longer shelf life.
→ What can I substitute for coconut oil?
You can use any neutral oil, such as vegetable or canola oil, but coconut oil provides a nice sheen and flavor.
→ Are these gluten-free?
Yes! As long as you ensure your chocolate chips are gluten-free, these cups are safe for a gluten-free diet.
Homemade Peanut Butter Cups with Cashew Butter
Created by: Megan Scott
Recipe Type: Everyday Baking Ideas
Skill Level: Intermediate
Final Quantity: 12 cups
What You'll Need
For the Chocolate Coating
- 1 cup dark chocolate chips
- 1 tablespoon coconut oil
For the Cashew Butter Filling
- 1 cup cashew butter
- 1/4 cup powdered sugar
- 1/2 teaspoon vanilla extract
- 1/4 teaspoon salt
How-To Steps
In a microwave-safe bowl, combine dark chocolate chips and coconut oil. Microwave in 30-second intervals, stirring in between until fully melted and smooth.
Pour a tablespoon of the melted chocolate into each cup of a silicone muffin mold. Spread it along the sides to create a layer. Place the mold in the freezer for about 10 minutes to set.
While the chocolate sets, mix together the cashew butter, powdered sugar, vanilla extract, and salt in a bowl until well combined.
Remove the mold from the freezer, and add a tablespoon of the cashew butter mixture into each chocolate layer, smoothing it out with the back of a spoon.
Pour another tablespoon of melted chocolate over the cashew butter filling in each cup. Make sure to cover it completely.
Return the filled mold to the freezer for at least 30 minutes until fully set. Once hardened, pop them out of the mold and enjoy!
Extra Tips
- For an added touch, sprinkle some flaked sea salt on top of the chocolate before chilling for a delightful contrast.
Nutritional Breakdown (Per Serving)
- Calories: 180 kcal
- Total Fat: 14g
- Saturated Fat: 6g
- Cholesterol: 0mg
- Sodium: 50mg
- Total Carbohydrates: 13g
- Dietary Fiber: 1g
- Sugars: 9g
- Protein: 3g